Oliver Barber give us a "How To" with Styrene
Verteran ScalerFab Team Driver Oliver Barber's "How To" - Simple Styrene work – a great way to create interiors, beds and more
It seems like a lot of people are put off from venturing outside the store-bought range of products when it comes to interiors, drop-beds, or other more-complicated bodywork projects, but it’s really a lot simpler than you may think! I should preface this by saying that until this point, my experience using styrene to create one-off styrene stuff was basically nonexistent; however, the final product turned out (in my opinion) quite well with some common-sense prep work.
This all started for me when I decided to bob and drop the bed of a hilux body that I was working on. The plan was to bob the bed myself (super easy with a sharp knife and some painter’s tape) and then pick up a pre-made drop-bed kit, such as the one made by pardonmyn00b, however a run-in with the wrong kind of brake fluid while stripping old paint off the body quickly disintegrated both that plan and much of the bed’s structural integrity, as can be seen in the photos. Rather than buy a new bed and start from scratch, I figured I would have a go at making a homemade-drop bed for the remaining bed sides that would have more surface area to keep things together – I couldn’t ruin the bed any more than it already was.
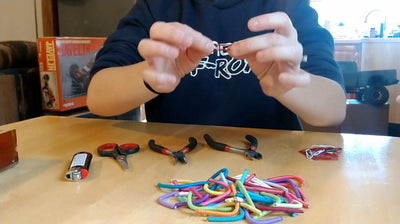
As I have a bit of a background with CAD design, I decided to grab some measurements from the bed-sides/frame and whip up a mock-up of what the final product would look like in Sketchup, as well as ensure that everything would fit properly. The styrene I was using was only about 1.4mm thick, but that adds up fast when trying to make things line up nicely. This would be much the same with a pen and paper, but I was able to visualize things more easily this way. I also made some inner fenders to 3d-print, but that would be reasonably simple to replicate with some more sheet styrene. With that done, I grabbed a ruler, setsquare, and sharp exacto knife, and spent the next hour or two cutting everything out and gluing it all together.
With that done, I sanded the bedsides flat, glued them on, made sure everything lined up with the cab, and then added the tubing around the top for a more recessed look. While it is not perfect, nor is it fully true to the 1:1, it definitely fits what I want it to do, and most of the imperfections should be hidden under some bedliner when it gets time to paint.
Hopefully this encourages you to try some projects of your own! It’s really not that difficult, and styrene is cheap even if you mess up (which I did a number of times while cutting parts out). One thing that I would keep in mind is that the right glue makes life so much easier; I recently started using MEK (Methyl Ethyl Ketone) instead of Tamiya super thin glue, and it makes a huge difference.


Leave a comment